Sunday, 15 April 2012

How to Compost and the Different Types of Compost Bins

Learn about the different types of compost bins and what household items can be composted!!!!

Composting is the natural breakdown of organic matter to produce a crumbly nutrient-rich soil. The resulting compost can be added to other soil types as a fertilizer, forming an excellent growing medium for plants. By managing this natural process in your own garden, you can dispose of waste, and produce an agent that will improve the look and yield of any plants and flowers. Regardless of the size of your outdoor space, there will be a composting solution to suit your needs.

Making Compost!!!

Theories vary on how to produce the perfect compost, but there are some general rules. Firstly, a suitable container or store is required. Different types and designs are shown here, including homemade, shop-bought, and recycled varieties. As the natural process of composting generates heat, storing compost in a container enables the heat to be retained more easily, and allows for the efficient breakdown of material. It is best to keep a compost heap covered to retain this heat, and to prevent rain from making the compost too wet. While some moisture is needed, it is usually supplied in the form of moist grass cuttings and other green waste

Building Up Layers!!!!

A system of layering different materials will aid the composting process and enhance the finished product. A layer of coarser, more fibrous material, for example, will introduce air to the center of the heap, which is vital as composting is an aerobic process. However, this may not always be a straightforward task. In the height of summer, for example, the majority of layers are likely to be grass clippings, so it is important to make sure you break up large amounts of one material with other layers—perhaps from the kitchen.
The process of composting takes between two and nine months. You will need to gain access to the base of the heap to take out the crumbly, fully decomposed compost for use on the garden. Some containers have an access hatch at the bottom of the container, while others may need one side to be disassembled so that the bottom level of compost can be dug out.
Slatted bins are great for gaining access to the bottom of the heap. The sides are easily disassembled, and the compost is normally integrated enough not to spill out (image below).

The Different Types of Bins!!!!

Purpose-built plastic bins are fitted with a hatch at the bottom for easy access of composted material (image 1). A slatted wooden bin encourages greater air circulation, improving the ventilation of the heap (image 2). A wooden sectioned bin can be disassembled in layers, allowing the heap height to be raised or lowered as required (image 3). As well as looking attractive, a hurdle-style compost bin offers good ventilation. The heap is accessed by removing one side (image 4). A concrete bin may have a block or slatted structure. Unlike its wooden alternatives, it will not rot (image 5). Large recycled containers, such as those used to deliver building materials, make ideal compost bins (image 6).


Wormeries!!!!

A wormery performs the same task as a compost heap, but on a smaller scale. Worms are kept inside a suitable container, where they eat organic matter; their waste products are then used as a fertilizer. Tiger worms are best for the job, as they live and feed on decomposing compost (unlike common earthworms, which prefer to burrow in soil). You can make your own wormery, or buy a kit that comes with a supply of tiger worms.Composting is the natural breakdown of organic matter to produce a crumbly nutrient-rich soil. The resulting compost can be added to other soil types as a fertilizer, forming an excellent growing medium for plants. By managing this natural process in your own garden, you can dispose of waste, and produce an agent that will improve the look and yield of any plants and flowers. Regardless of the size of your outdoor space, there will be a composting solution to suit your needs.Theories vary on how to produce the perfect compost, but there are some general rules. Firstly, a suitable container or store is required. There are different types and designs, including homemade, shop-bought and recycled varieties. As the natural process of composting generates heat, storing compost in a container enables the heat to be retained more easily, and allows for the efficient breakdown of material. It is best to keep a compost heap covered to retain this heat, and to prevent rain from making the compost too wet. While some moisture is needed, it is usually supplied in the form of moist grass cuttings and other green waste.

Materials That Can Be Composted

The complete list of items that can be composted is extensive, but it can be categorized generally as either brown waste or green waste. Although all organic matter will compost, it is advisable not to compost items that may attract vermin or disease.

Green Waste Items for Composting

As the name suggests, this category includes all types of green leafy garden waste. Other types of fast-rotting waste material is also included in this group. All these items have a high nitrogen content
Example Ingredients:

  • Fresh grass clippings are a plentiful summer supply and should be layered with other items.
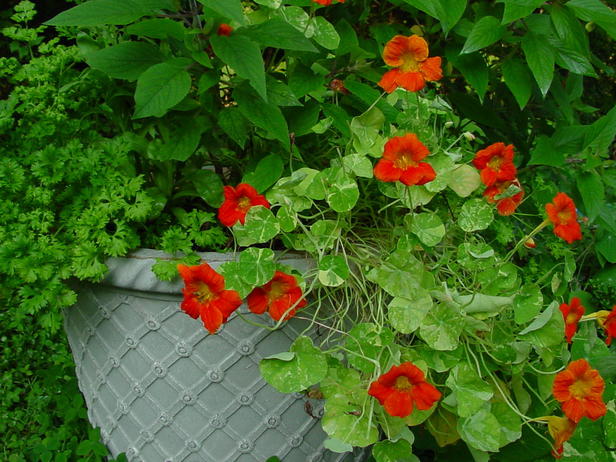
  • Flowers - stems should be chopped up; don't use diseased plants.
  • Nettles act as good natural activators.
  • Vegetable and fruit peelings can be added straight to the heap from the kitchen.
  • Vegetable crop residue, such as potato and tomato plants.
  • Young weeds, but avoid perennials.
  • Herbivore manure, such as from horses, cows and rabbits.
  • Tea leaves, but tea bags will take longer to break down.

Brown Waste for Composting


This category refers to the slower-rotting items that have a high carbon content.
Example Ingredients:

  • Dead or fallen leaves - use only small amounts
  • Shredded paper
  • Coffee grounds and filter - use only paper filters
  • Cardboard torn into small pieces
  • Woody hedge clippings and twigs ideally put through a shredder
  • Sawdust mixed well with more aerated material
  • Herbivore bedding, such as hay and straw

Other Items for Composting


There are a number of other items that are not immediately obvious candidates for composting but that are nevertheless suitable.
Example Ingredients:

  • Egg shells washed and crushed up
  • Hair - either human or animal hair since both are high in nitrogen
  • 100 percent wool or cotton cut into small pieces or tumble-dryer lint
  • Vacuum-bag contents, but use common sense as to what has been picked up
  • Wood ash in small quantities

Items Not to Compost


Although all organic material breaks down, avoid the following as they may attract vermin and harbor potential pathogens:

  • Meat and fish (cooked and raw) can harbor disease and attract vermin.
  • Dog and cat feces can harbor disease.
  • Cat litter will normally contain feces.
  • Glossy magazines contain too many inorganic chemicals.
  • Barbecue coals and coal ash contain harmful sulphur oxides


Thursday, 12 April 2012

Mulch Matters!!!!

Trees, shrubs and plants could vote on what covers their feet, it would be mulch every time. Not only do mulches dramatically reduce evaporation of water from the soil surface, but by reducing weeds they help prevent competition for water. As a result, soil moisture stays more constant and roots grow better.

Organic mulches save a bit more water than stone mulches, but just about all mulches do a good job. And almost any soil cover is better than none at all.


On bare soil, two-thirds of the water we applied was lost through evaporation. "When the soil was mulched, only 10 percent of the water was lost from evaporation." We recommends using a mulch that has both large and small pieces so that it will receive water well and also won't easily float or blow away. Use mulch on potted plants too.

So mulch is good. But what kind of mulch? And how much?

Organic or Inorganic?
The Anasazi Indians in the ancient Southwest successfully gardened in arid land, thanks to the gravel and rocks they placed on the soil's surface. Inorganic mulches--rocks, gravel, marble, brick chips--conserve water and shade the soil, but they don't improve it.
Use those mulches in fixed landscape beds that you don't plan on redigging and replant-ing. Small gravels migrate easily, working their way down into the soil. Even fairly large rock or brick nuggets can wash or get kicked out of their landscape beds.

No matter what kind of soil you have, an organic mulch is bound to eventually improve it, even if it never gets turned in. "Organic matter is the magic elixir"

"It does good things for poor soils of almost any type. If the mulch stays on top, the change will happen more slowly, but earthworms and microorganisms will slowly break it down and mix it in. And of course every time you disturb the bed in any way, such as when you're planting annuals, it happens much faster."
Organic mulch adds fertility to sandy soils and helps hold water and nutrients; it loosens and helps drain heavy clay soils; it adds micronutrients that might be missing from even a good garden loam.
The organic mulches highest in lignin--an organic compound in woody plants--take the longest to break down. Bark has more lignin than wood, so bark mulches last longer than wood mulches. Cypress and pine straw last almost as long as pine bark.
 
Also, the faster the mulch percolates water and the drier it stays, the longer it lasts. "Pine-bark nuggets will last a long time,"."There's a lot of air space between the nuggets, and the microorganisms don't have enough moisture to break them down."
Dark or Light?
Mulch cools the soil by either absorbing heat from the sun and not transferring it to the soil (dark organic mulch, such as bark and wood) or reflecting the heat (light mulch, such as rocks or light-colored woods) so that it's not passed down to the soil below. In most cases that's good, because overheated roots don't have to work so hard.

In very hot or sunny areas, however, the heat radiated from the mulch can do a number on sensitive plants. Roger Kjelgren, associate professor of urban horticulture at Utah State University in Logan, has found that on a summer day dark-bark mulches can reach temperatures of 140 to 150 degrees F--hotter than asphalt. Since heat rises, that means plants can shut down and stop growing. The plants most prone to suffer? Those with large leaves and any that prefer partial shade or that can't tolerate heat.
"It depends on the extent of the mulch area," says Kjelgren. "In a large area of mulch, putting an oakleaf hydrangea out there would probably fry it. Over time, as the plants that do well establish sufficient cover, the mulch becomes shaded."
So if you're planning to use bark mulch in a sunny bed, make sure the plants are heat tolerant. This is especially important if the mulched area is large and the plants are young and small. Most inorganic mulches don't get as hot because they transfer some heat to the soil below. The exception--lava rocks--heat up almost as much as bark mulch.
Remember, too, that as winter approaches, a sunny day could interfere with the plant's adjustment to cold. Dark mulch can absorb the heat during the day and release it at night, which may interfere with the plant's adjusting to cold winter temperatures.
How Should It Smell?
If you're buying mulch from large piles that may not have been turned in a while, make sure you give it a sniff test first. Good mulch has a clean smell like fresh-cut wood or soil. The odor of vinegar, ammonia, rotten eggs or silage means that the mulch has gone sour--a toxic condition that results from too much moisture and too little oxygen. Sour mulch can seriously damage and even kill plants within 24 hours after application.

Can Mulch Change Soil pH?
Most people believe that mulches like pine straw and pine bark will turn the soil acid below. Actually, that's true only some of the time. Some soils--such as clay and those with plenty of organic matter--are extremely resistant to change. Many studies have shown little or no effect on soil pH, even with pine straw on an already acid soil. "If you've got a material that's acid or alkaline "it will probably have a bit more impact on sandy soil than on a clay soil

How Much Is Too Much?
You can easily suffocate a plant by mulching too deeply. The same goes for laying any impermeable cover--such as plastic or several layers of cardboard--that doesn't allow the soil to breathe."If you keep gas exchange from happening, that's where you run into trouble. You stick your finger under there, and you've got a swamp. It smells sour, and there's anaerobic activity. That's when you get into root problems."
The less porous and more compactable the mulch, the thinner you spread it: for very finely shredded hardwood, no more than two to three inches deep; coarse nuggets, three to five inches; loose straw, up to six inches deep for wintertime protection of sensitive plants. Top off aging or discolored mulch with a minimum of new material
How Close Should I Mulch?
Don't give wood borers and other insects easy access to your trees, shrubs and herbaceous plants: leave a space of eight inches between mulch and tree trunks or tender stems. Also be sure to keep wood products (and possibly termites) away from your home's foundations.
Is It OK to Use Sawdust?
Sawdust is fine to use as a mulch as long as it's aged and composted first to get rid of heat buildup. Because it ties up nitrogen at the soil surface, don't use sawdust around heavy feeders and plants that have roots close to the surface.
But you also have to know its origins, "Does it come from treated wood? If so, some of the preservatives are toxic and also have the potential to leach. Also, is there any black walnut or other material harmful to plants?"
How to tell if it's aged enough? "It will look discolored, more amorphous and more humusy. You might still be able to recognize it as sawdust, but it looks very much degraded." Cypress and redwood sawdust degrade very slowly.

Tuesday, 10 April 2012

How to Grow a Basket of Crops

Hang a basket brimming with leafy herbs and succulent tomatoes close to your kitchen door for easy access to fresh ingredients. With a sprinkling of annual flowers, this pretty mix is a match for any bedding design!!!!


When to Start: Mid- to late spring
At Its Best: Summer
Time to Complete: 2 hours

Materials Needed:!!!

  • large hanging basket with liner
  • soil-based potting mix, combined 50:50 with multipurpose potting mix
  • slow-release granular fertilizer
  • plastic bags
  • gravel mulch
  • liquid tomato fertilizer
  • tomato plants
  • violas and nasturtiums
  • herbs; those used here are: basil 'Magic Mountain', chives, flat-leaved parsley and thyme

Prepare the Basket!!!!!

Buy the largest basket you can find, ideally with an integrated liner. Because tomatoes are greedy feeders and need lots of water, they may not be as successful in a small basket that holds a limited amount of soil, water and food. Line the base of the basket with a sheet of plastic to create a reservoir at the bottom. Stand the plants in a tray of water for 30 minutes until the top of the soil is moist. Remove, and leave them to drain.

Plant the Sides!!!!

Half-fill the basket with potting mix. Cut two or three crosses in the liner above the soil. Tip a thyme plant from its pot and wrap the leaves in a plastic bag. Carefully push the bag from the inside out through a slit, so the root ball is resting on the soil. Repeat with the other thymes

Mix in Fertilizer!!!!

Fill in around the thyme root balls with soil mixed with slow-release fertilizer. Top up the basket with more soil to 4 inches from the rim.

Add the Plants!!!

Set out your plants in their pots to check that they fit. Then plant them up at the same level they were at in their pots, with the tomato plants at the edge and the basil in the middle of the basket

Water Daily!!!!

Add a gravel mulch. Hang the basket on a strong bracket in a sunny spot. Water daily and feed every week with a tomato fertilizer. Harvest leaves from the herbs as you need them, and pick the tomatoes when they are ripe.


Sunday, 8 April 2012

Top 10 Rules for Growing a Kitchen Garden

Growing fruits and vegetables isn't rocket science, but it does involve science. Here are easy tips to help ensure your success in growing food in the garden!!!!!

Find the sun. Most vegetables want six hours of direct sun a day — and more if they can get it. Exceptions include lettuce and radishes, which can get by with less

Start small. If you're beginning your first garden, help yourself avoid the feeling of being overwhelmed with weeding and general maintenance. You can grow a surprising amount of food in a bed just 10-foot square

Build up your soil. The foundation of a healthy, productive garden is a rich, well-draining, crumbly soil that has good tilth. Liberally add organic matter such as finished compost, bagged humus and straw.


Time your crops. Soil temperatures matter as much as air temperature when you're planting. Even peas, which are spring crops that are resistant to light frost once they're growing, won't germinate when the soil is below 39 degrees


Be ready to supply cover if a late frost hits. Here, early-spring veggies grow under plastic


Mulch, mulch, mulch. You wouldn't think twice about mulching your ornamental beds, so do the same with your veggie and fruit plantings. Keeping a layer of organic mulch over this radicchio's shallow roots helps conserve moisture and suppress weeds


Anticipate animals pests. To a raccoon these young corn plants mean dinner in the making, once the ears are fully developed. Talk to your neighbors and try to learn what pests to expect in your area. With the right kind of fencing, you can deter raccoons, rabbits, groundhogs, deer, dogs and other unwelcome visitors.

Mingle your plants. Too much of the same kind of plant in a grouping sends 'eat here' messages to bad bugs. Here, squash, peppers and beans share the space.


Stay on top of the harvest. Pick produce when it's ready. Removing beans as they mature allows more of the plant's energy to go into supporting the later fruit that forms

You don't have to hide your vegetable garden. Where you can, find a way to integrate your fruit and veggie garden with an area of your yard where you tend to hang out. When the crops are close at hand, you're much more likely to pluck off a bad bug or give a thirsty plant a drink.


The Kitchen Garden!!!!!

Planting Among Vegetables !!!

Chives (Allium schoenoprasum) make a very pretty and effective edging plant, but it is unlikely that a large quantity will be needed as this is a cut-and-come-again herb, which regrows quite quickly. Good-sized clumps can be sown among your other vegetables, perhaps in a grid pattern to help remind you of the crop rotation compartments that are so useful in keeping the plot productive. Planted near peas and beans, chives may also help reduce insect pests.

Crop Planning


Short rows of lettuce provide the opportunity to grow many different salads and succession sowing can keep crops producing for most of the year. Try interplanting with small rows of leafy herbs, such as lamb’s and miner's lettuce, chicory (Cichorium), dames rocket (Hesperis matronalis), red orache (Atriplex hortensis var. rubra), and French tarragon (Artemisia dracunculus), or perhaps garlic chives (Allium tuberosum). If there is the space, grow a large row of comfrey as this makes a superb compost activator and liquid fertilizer.

The Community Plot


The large, dedicated kitchen garden may be a thing of the past, but community plots are very popular again. Many herbs need continual cropping to keep healthy and lush while others just look unattractive when they have been cut or cropped. These are ideal for growing in the vegetable patch, but it is not necessary to grow in rows — clumps and patches can look very attractive. Nasturtiums (Tropaeolum) sown in late spring will rapidly germinate and spread into a sizeable clump. Many cultivars are available and they all have edible flowers and the bright colors attract pollinating bees. Try planting them next to your planned salad bed so you can harvest both at the same time.

How to Create an Ornamental Edible Garden!!!!

Try these tips for making the food section of your garden more attractive!!

Plant a pretty container with a mixture of herbs and edible flowers such as nasturtiums

Mix your edibles with ornamentals. By interplanting a variety of different plants, you'll boost the attractiveness of your vegetable garden and likely reduce the pest problems often seen in big plantings of the same crop


You don't have to give up great taste when you choose a good-looking plant. Many types of lettuces and Swiss chard are as pretty to look at as they are good to eat.

Create attractive hardscaping and use seasonal ornamentals that help take the focus away from the beans, potatoes and other veggies that tend to start looking disheveled as they mature.


This beautiful little kitchen garden features herbs, fruits and vegetables, arranged with easy-to-harvest accessibility in mind. As summer wears on, and some edible plants begin looking a bit tattered, the semi-formal design and stone path hold the look together.

Thursday, 5 April 2012

Greenhouse............

Greenhouse Flooring, Heating and Staging !!!!!!


Greenhouse floors need to have excellent drainage. Floors can be made of concrete, stone slabs, brick, sand or even dirt. Gravel floors provide excellent drainage and can be used in conjunction with a weed barrier to keep weeds from growing up through the rocks.

Gas heat is more expensive to hook up initially, but in the long run it's more economical. A heater is especially important in colder zones, where a greenhouse may be heated for months at a time. A greenhouse needs to maintain a minimum temperature of 55 degrees for most plants.

Keeping your greenhouse cool is just as important as keeping it warm. If it gets too hot, the plants will suffer. This greenhouse uses an evaporative cooling system to keep temperatures down. It also helps keep inside air circulating: a key ingredient for healthy plants. Vents in the ceiling let hot air out when the temperature rises.

Staging areas are important in the greenhouse. These are places where tables and benches are set up to act as plant stands or work areas for potting plants, filling flats, etc. Staging areas give you more usable space.

Freestanding staging pieces are made from durable plastic and fiberglass, materials that are rust- and warp-proof. When setting up a freestanding staging area, leave a generous gap between the back of the staging and the side of the greenhouse to allow for air circulation. Freestanding staging can be moved around to accommodate different plants in different seasons and removed from the greenhouse when not in use.

In a greenhouse, using every inch of space is essential. A 12' x 12' greenhouse is fairly large, but it will quickly fill up once you add plants, shelving, lights and other accessories. The walls in this greenhouse are clear from floor to ceiling, letting light in on all levels, including the floor. You can also use otherwise empty ceiling space by hanging baskets.

To start new plants from seed, you can set up a propagation area. Naegeli suggests using a germination mat because it heats the bottom of a seed tray and thereby stimulates growth. Seeds need more warmth than other plants in the greenhouse, so this is a very localized way to heat one area of the greenhouse without raising the entire greenhouse temperature.

Water and Lighting in a Greenhouse!!!!!!


Water and light are essential to plants, and in a greenhouse you'll have to provide both. There are several different watering methods to choose from: hand watering, capillary mats that bring water up from below, overhead watering, and drip irrigation that delivers water directly into each pot.
Greenhouse expert Scott Naegeli says a drip irrigation system is easy to lay out and is very cost-effective. It delivers small amounts of water over long periods of time, so plants stay uniformly moist. Installation is fairly simple:
  • Be sure the mainline that carries water into the greenhouse is sunk underground at least four feet, which is below the frost line, to make sure the water in the line doesn't freeze.

  • Use a 3/4-inch poly pipe as the water supply line. Position it to run down the length of the bench.

  • From the main line, connect lateral lines to run between pots.

  • Set the system on a timer to ensure regular watering.

Once the water system is in place, you'll need to address any lighting needs. Although fluorescent lights are popular, they help the gardener more than the plants. This type of lighting is good to work by, but plants need more light, especially in northern regions.
A high-pressure sodium bulb does a better job of simulating sunlight to stimulate plant growth. A 125-watt bulb gives off plenty of light when hung at least three feet above plants or seeds. This is a good distance to avoid heat burn.
Grow lights help to lighten shady spots and propagation areas in the greenhouse. What you are germinating or propagating determines how long you need to leave the lights on, usually an average of 12 to 16 hours each day. If you are growing tropical plants, you may need to set up grow lights if the plants don't get at least eight hours of sun each day.

Choosing a Greenhouse!!!!


Having a greenhouse means never having to give up gardening because of the weather. You can continue to propagate seeds and cuttings and grow a variety of plants from season to season. Having a home greenhouse is a dream for many gardeners, and there are many styles and sizes that fit most budgets and space considerations. When deciding on a style for your home, the sky's the limit. There are small solariums, medium-size greenhouses and larger structures like conservatories.
You'll find most greenhouses are made from aluminum, which is lightweight and weatherproof. Galvanized steel is also lightweight and very sturdy. You can also use wood, but be sure to choose pressure treated lumber, cedar or redwood for weather resistance. No matter which type of greenhouse you decide on, there are several considerations when choosing a building site:
Light
  • Sun-loving plants need six hours of sunlight. Sites with less need supplemental light.
  • A sheltered area is good, but too much shade results in poor growth. Look for trees, shrubs and structures that may cast shade.
  • Southern exposure is best, east or west is okay, but northern exposure is probably too shady.

Exposure

  • If the site is too exposed, it will be costly to heat in winter and keep cool in summer. Insulation can help in this situation.
  • Protection from wind will keep the greenhouse sturdy longer.
  • Too much shelter can mean not enough light.

Foundation

  • Be especially careful to choose a level area where water doesn't collect.
  • Many foundations are dug in and then filled with concrete.
  • Plan ahead when possible; the less frozen, wet or snow-covered your yard is the easier it is to lay the foundation. Contractors can thaw frozen ground and move snow, but it costs more.

Proximity

  • Putting a greenhouse against a house makes connecting water, gas and electricity easier.
  • The area in front of the greenhouse should be clear of obstacles.
  • The path leading to the greenhouse should be level and wide enough for a wheelbarrow. Be sure the ground is hard enough to withstand wheelbarrow traffic.

Materials

  • Galvanized steel, which is lightweight, is sturdy and won't rust. It can withstand weight up to 100 pounds. It's also good for windy areas because it can withstand winds up to 70 miles per hour, making it a good choice for inclement weather.
  • The greenhouse walls can be constructed from glass, which is heavy and can be expensive; film plastic, which is economical but not insulating enough for colder regions; or a rigid plastic, which is shatterproof and retains heat.

Assemble a Greenhouse Kit!!!!

Materials and Tools:
eight 12-foot 4x6 landscape timbers
one box landscape spikes
10-pound bag white gravel
three 12-foot 4x4 posts
12 10-foot pressure-treated 2x4s
15 10-foot 1-1/4x6 pressure-treated decking
greenhouse kit
3-1/2 inch galvanized nails
air compressor with hoses
framing nailer
hammer
level
line level
measuring tape
pencil
power miter box
rakes
safety glasses
shovels
string line
    Steps:
    1. Greenhouse kits require a simple foundation, basically a perimeter of landscape timbers with a gravel floor. Based on the measurements given in the kit, make a square, level perimeter of 4x6 landscape timbers

      2)  Nail the landscaping timbers together and spike them to the ground using landscape spikes. Check for square by measuring opposite diagonals. When the diagonal measurements are identical, the box is square 
  
   3)  Lay down landscape fabric to eliminate the weeds, then dump in 4 to 6-inches of gravel. This will assist in drainage.
  
4). Following the manufacturers instructions, assemble the greenhouse kit


5). If desired, build and secure workbenches for the inside of the greenhouse. Bolt a 4x4 post to the landscape timber bottom frame. Then, make a perimeter of 2x4s. Next, make an inner perimeter of 2x2s, measuring 1-1/8 inches from the top of the 2x4 frame. This will give you a ledge to set the shelving boards on. Once that’s done, just lay in the shelving boards

Monday, 2 April 2012

Spring Gardening Guide

Hearty annuals like pansies can be planted in early spring to brighten your mostly still-dormant garden

Grab your gardening boots and get ready to get your hands dirty. With so many returning to their roots this time of year, a talk is in order with Sheri Ann Richerson, author of "Complete Idiot's Guide to Year-Round Gardening" and "101 Organic Gardening Tips," to get the dirt on how to weed, prune and prep gardens for spring.

Early Spring: Determine Your Start Date!!!!

While spring technically begins on March 21st, it's important to take your climate zone into consideration. "Remember, most plants prefer frost-free conditions and soil temperatures that are 50 degrees Fahrenheit or higher," Richerson said. "You can use a cheap kitchen thermometer in place of the more expensive soil thermometers -- simply insert the probe into the ground and let it sit there for five minutes so you know you are getting an accurate reading." In terms of gardening, spring starts when the soil says so.

Early Spring: Check the Soil!!!!

First, check your soil. "Never work wet soil," Richerson said. "Pick up a piece of soil with your hands and squeeze it into a ball. If water comes out, the soil is too wet. If the soil crumbles and won’t form a ball, it is too dry." If the soil forms a somewhat crumbly, loose ball, you're ready to start prepping

Early Spring: Clear the Area!!!!

"Remove plant debris from the garden," Richerson said. Rake your leaves, clear out old mulch and pay special attention to unwanted refuse in the beds. If you need to turn the soil, do it by hand instead of using a roto-tiller. While you're down there, be on the lookout for insect eggs belonging to ladybugs, praying mantis or other "good bugs." "If you find these, try to leave them alone," Richerson said. Not only do they eat the "bad bugs" (the bugs that eat your plants), they also often keep you company while you garden.

Early Spring: Get Rid of Weeds!!!!

With weeds, the best defense is a good offense. "Remove weeds as soon as they begin to emerge," Richerson said. "You can pull them or chop them off right below ground level." The goal is to get rid of any unwanted growth before it starts to steal the sunlight and nutrients from the plants you're trying to nurture.

Early Spring: Prune Now to Enjoy Later!!!!!

Trees, shrubs, flowers and houseplants all need to be pruned. "Pruning encourages new growth and helps give plants a nice shape," Richerson said. "Some plants need pruning to encourage them to continue to flower or flower more profusely." If you've never pruned before, think of it like a routine trip to the barber shop, except you're the barber and your garden is the customer. Essentially, your giving your plants a haircut and encouraging them to take a specific shape. "Always make cuts at a 90-degree angle right in front of a branch or leaf cluster," The goal is cut as close as you can without damaging the part of the plant you're hoping to keep. In terms flowering shrubs, remember that it's best to prune them after they flower so you don't accidentally trim off a baby bud

Early Spring: Start Your Seeds!!!!

Now's the time to plan ahead. "Consider the plants you want to start from seed and how much room you have before you begin," Richerson advised. Then, get out your calendar and count backward. "The typical indoor seed starting time frame depends on the type of seeds -- the average range is anywhere between four weeks and 12 weeks prior to the last frost in your area


Early Spring: Start Your Spuds!!!!!

Potato planting begins as early as November, but if you get them into the ground before St. Patrick's Day, you'll be fine. When you begin to plant your potatoes, select a spot in full sunlight and dig a trench 12 inches deep. Then "fill the bottom 4 inches with grass clippings, leaves or straw and place the sprouted potatoes on top of the straw -- be sure they are cut up and cured first," Richerson said. "Cover them with an additional 4 inches of grass clippings, leaves or straw and a light layer of soil." When you start to see refill the trench with your displaced soil

Early Spring: Plant Cold-Loving Annuals!!!!

In the early spring, you can plant some of the heartier annuals, such as pansies, like the ones here, and snapdragons. "Once heavy frosts in your area are over – typically four weeks before the last expected frost, you can begin planting annual plants that don’t mind light frost

Mid Spring: Plant Trees and Shrubs!!!

If you're buying partially grown trees or shrubs, wait to buy them until you are ready to plant them. "A good rule of thumb is to dig a hole two-to-three times larger than the plant's root ball, amend the soil with organic matter and back-fill the hole," Richerson said. "Remember, the roots need to grow into the soil, and hard, thick, packed soil is not ideal for anything."

Mid Spring: Divide Your Crowded Perennials!!!!

Perennials, by definition, are plants that grow from the same roots year after year, like the mass of daisies here. Unlike annuals, they don't die after germination. This means you don't have to replant perennials each season. But you do have to be wary of overcrowded roots. The solution is to divide them. "If the perennials are dying, don’t wait," Richerson said. "Do what you can as soon as possible to save some of the plant."


Mid Spring: Plant Cold-Loving Vegetables!!!!

Peas, carrots, radishes, turnips, cabbage, lettuce, spinach, kale and Swiss chard are just a few of the cold-loving veggies you can plant mid-spring. If you're already a seasoned veteran in the garden, take notes from Richerson. "I start planting seeds for my spring garden in January and continue through March. Most people won’t start until April," Richerson said. "I also replant all those frost-loving vegetables again in July and August for a fall/winter harvest."

Mid Spring: Protect Your Plants!!!!

If the soil dries out, your plants have already suffered. "Those tiny feeder roots dry out and then the plant cannot take up water and nutrients as necessary," Richerson said. To protect your plants from dehydration, use compost both before you plant and when the weather heats up. "It warms the early spring soil and cools the soil in summer by protecting the plant's roots."


Late Spring: Plant Heat-Loving Annuals!!!!

 Impatiens, petunias (like these), geraniums and begonias are among the heat-loving annuals you can plant in late spring. "Plant them after the last frost in your area,"

Late Spring: Prune Spring-Blooming Shrubs!!!!


 As soon as your spring-blooming shrubs, like the lilacs here, finish flowering, it's time to prune them. "The exception: plants that produce berries," Richerson said. "If you prune these, they will not fruit."